
I have been beta-testing the Adobe Fresco digital painting and drawing app and now that it was launched a few days ago, I can finally talk openly about it! Yay! So, let’s start the conversation. (All images included here were created with Fresco.)
My main app of choice for working live (doing digital graphic facilitation, graphic recording, scribing, sketchnoting) recording explainer videos) has been Adobe Illustrator Draw, but since Adobe has decided to stop developing it—I need to see if Adobe Fresco can be my go-to app or should I take the plunge and learn something completely different like Concepts or Procreate. (BTW: Procreate 5 has some amazing features coming!!!)
I am certainly willing to give Fresco my serious attention—and once they integrate the shapes tool, colour themes/palettes & Adobe Capture—it will not be such a huge transition from Draw.
So, here is a first look at some of Fresco’s features. This is not a comprehensive guide, but more of a reflection of some things that have caught my attention—for the good and bad.
There are 3 different types of brushes available in the app: pixel, live. and vector brushes. I will not go into the pixel or live brushes at this point. I am just focussing on the vector brush because that is what I have been using in the Draw app.
The vector brushes
As you can see in the image below, there are 4 vector brushes and they are completely editable. You can tag & edit your favourite brushes so that you have a limited choice of brushes available. At this point you cannot save multiple versions of the same brush as you could Draw. Maybe this feature is still coming?
You are also able to change the UI a bit to adapt to your way of working. For example, if you needed to have access to your vector brushes and wanted to decrease the amount of tapping you would have to do—you could keep the Vector brushes panel on your screen and move it anywhere you like. Now, because I am working on a smaller sized iPad Pro, this panel takes up some space on the screen. Also if I am working live and projecting my work in realtime, it is just one more bit of clutter that participants can see.

Moving your colour panel around your screen
You can place your colour panel anywhere on the screen you think would be helpful. You can also change the set up of the toolbar if you are left-handed, etc. Just take a look at the preferences options available.
(This is an aside which I discovered by accident: if you use image layers in your work and otherwise work with vector brushes—watch out! If you merge the image & vector layers, the merged layer will convert to a pixel layer. I have not found any workarounds yet, but hopefully I will!)

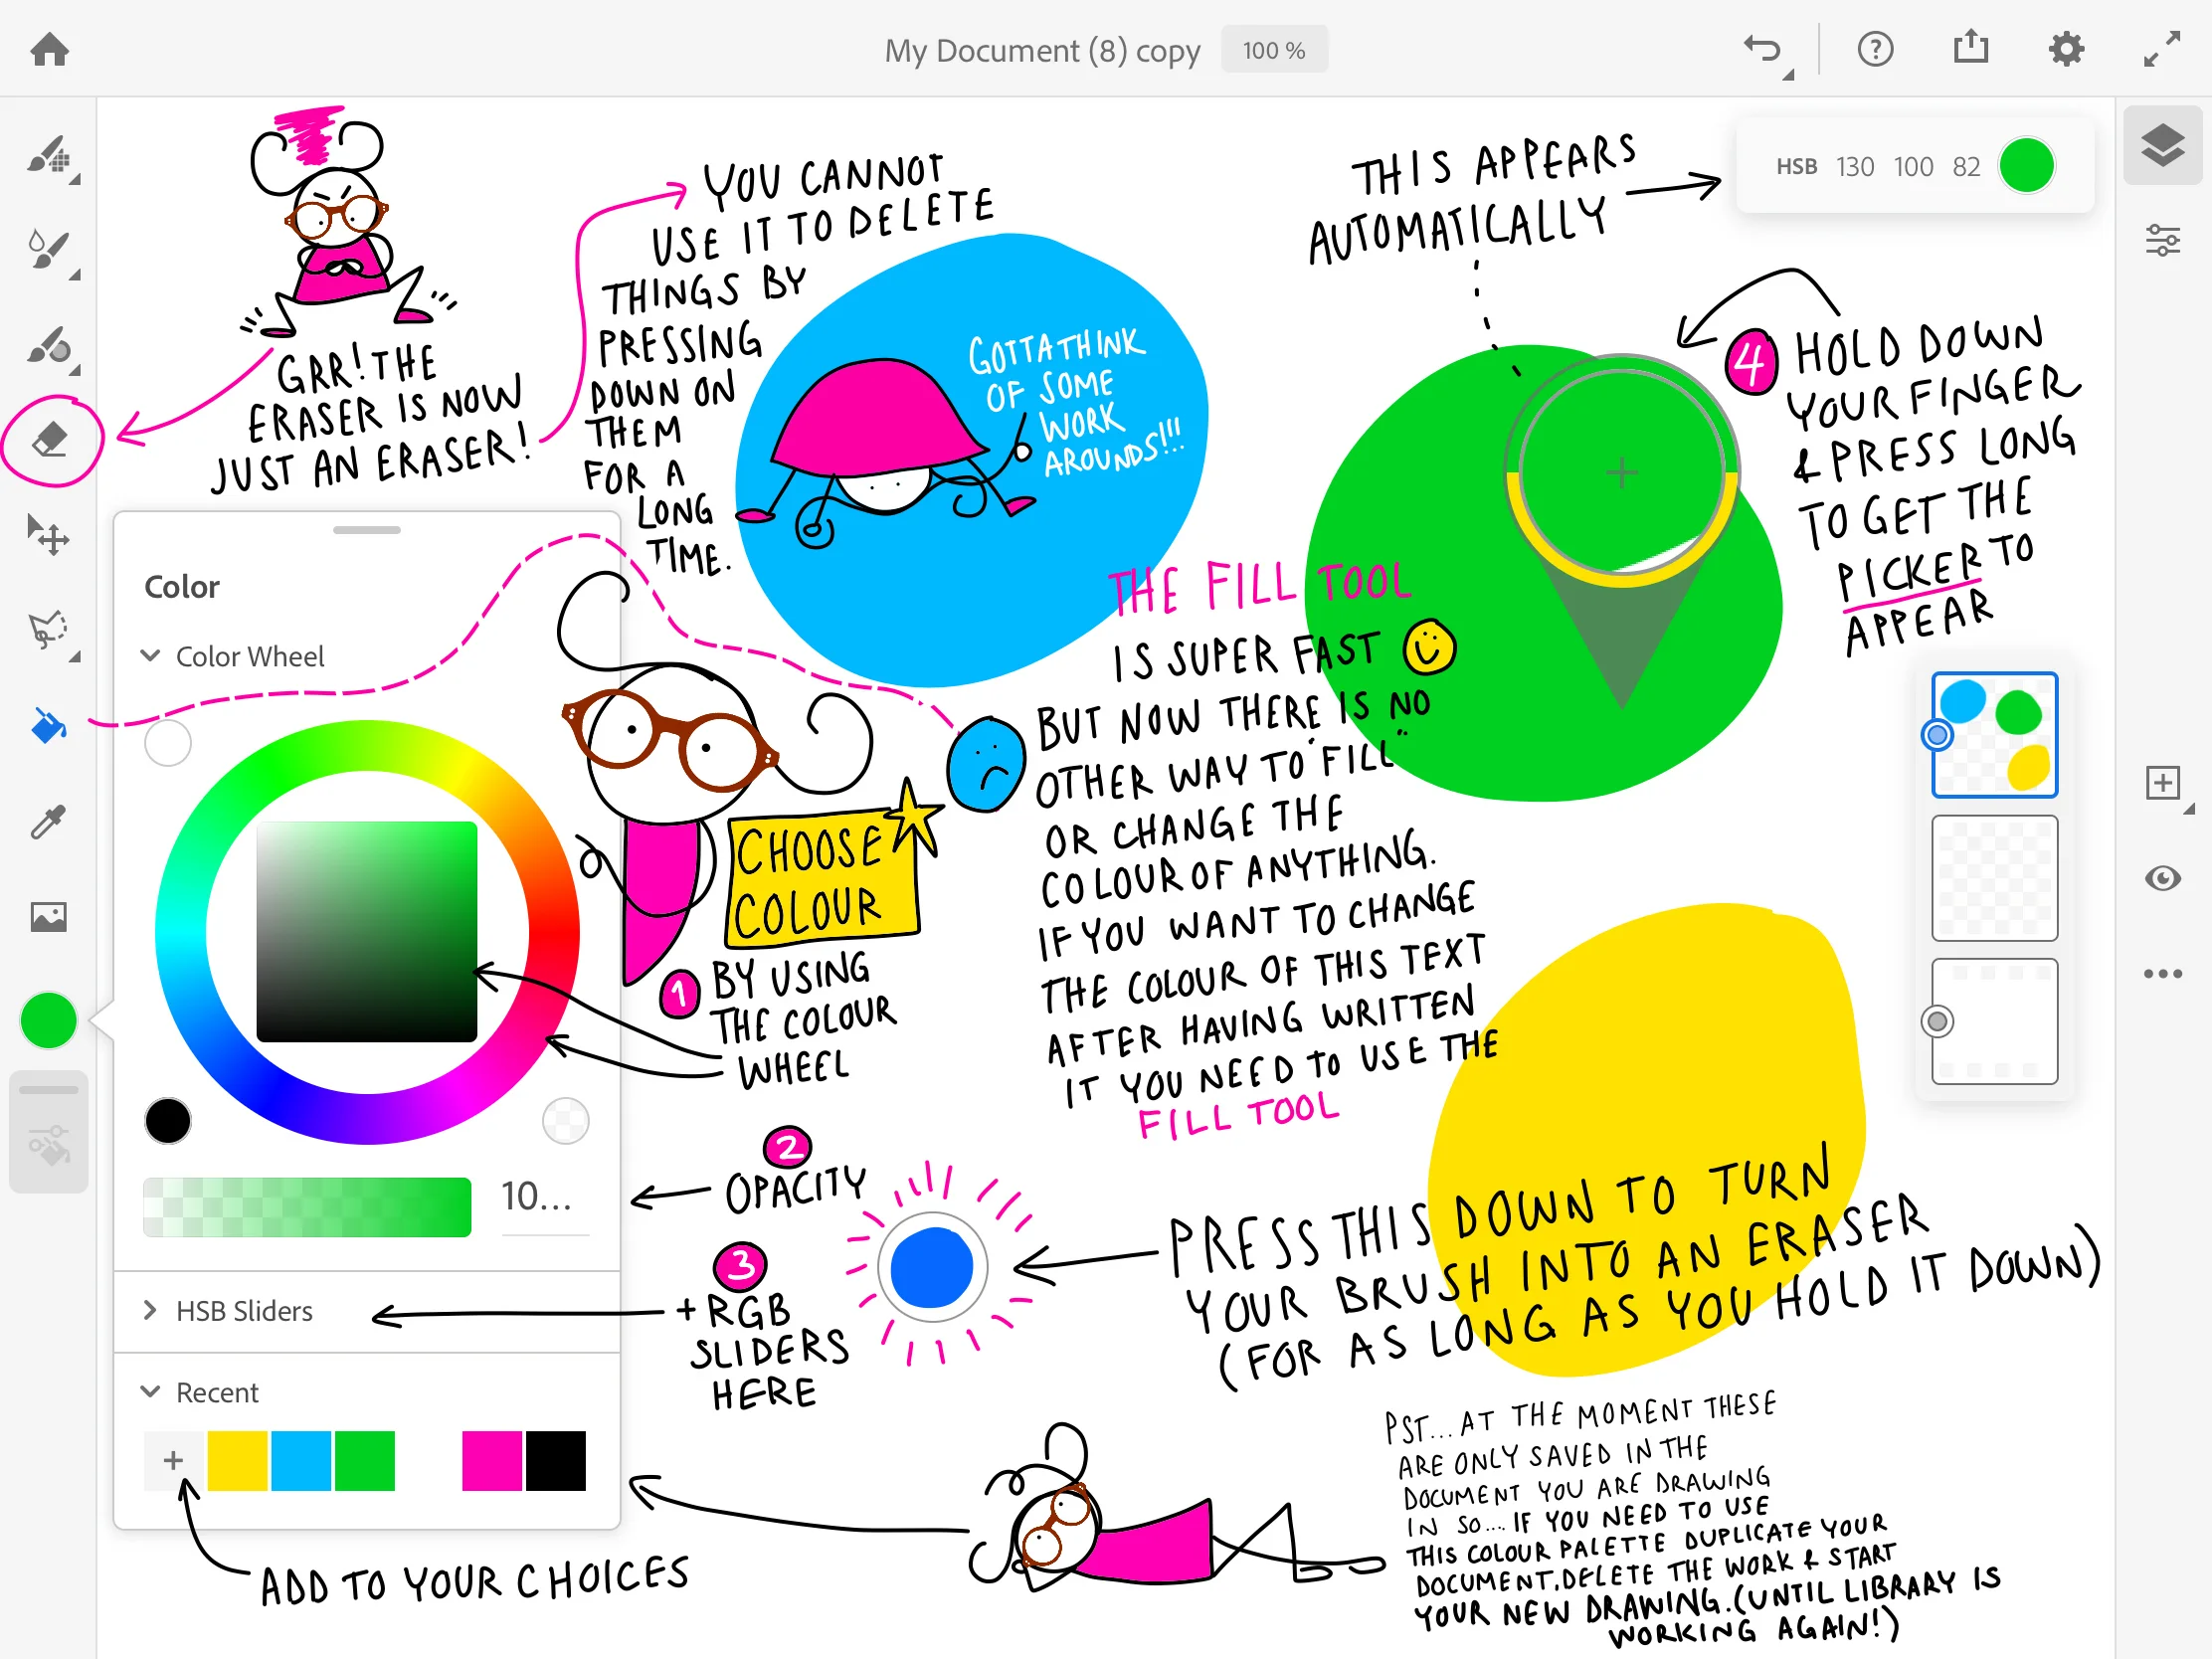
Choosing colours, erasing & filling
In the image below you will find a summary of some of my discoveries.
If you want to choose a colour you can:
1. use the colour wheel
2. change the opacity
3. use the HSB or RGB sliders
4. use the colour picker
At the moment you do not have access to colour themes or palettes so I have thought of a work around for the time being. See the image!
The new FILL tool
A new tool that we have did not have in Draw is the fill tool! It is super fast, but the option of pressing your brush down for a longer time to fill a space is now no longer available. Always having to switch tools causes some delay in the workflow (and some getting used to!!)
The eraser
One feature that I sorely miss is the multitasking eraser which Draw had. Now, the eraser is just an eraser. I used the delete function of the eraser in Draw quite a bit to get rid of large areas or tiny spots of colour very quickly, etc.
I have to have a think about it and am sure there must be a workaround—maybe using the new lasso tool. Regardless, the present option leaves us with using slower solutions.
However, one new feature I do like is the “Touch Shortcut circle” (that you can see in the middle bottom of the picture below). Press the Touch Shortcut and hold it down while you use your vector brush. This temporarily changes the action of the brush to an eraser. The Touch Shortcut gives you a quick way to erase with the selected brush—and without switching tools. Cool! (There are also other ways to use this tool—see the app for list of touch shortcuts.)

The lasso tool
Adobe has given us the long awaited lasso tool so we can move things around and I will go into that tool in more detail once I have made some more experiments. Basically—we can finally cut, paste and move things around—but I think there might be more uses to this tool than that.
Projecting & working live
As far as I can tell, there is no way to change the view that will be projected through a beamer or shared on another screen. So, that means whatever is on your screen or whatever you do on your screen will be visible to your audience. That’s too bad! It would have been nice to have that option that Procreate has. (You can clear all your tools away with one touch:)
Time to practice, experiment and communicate with Adobe
Like with anything new—this is going to require some learning and mucking about. I need to do some experimentation and play with the app in order to find out what it can do—that Draw couldn’t. I need to discover how this app can change the way I am working and in the process disrupt my own practice once again. Who knows what marvellous possibilities await…in between the moments of frustration…I will keep you posted.
In the meantime, there are lots of sources to learn from. People are posting amazing work on Behance, creating reviews on YouTube, discussing the app on twitter and posting about it on Insta: #AdobeFresco